Burp suite with mobile application
0 --> Configuring Burp to proxy traffic from mobile apps
- Tutorials
- by Jacob Riggs
- 12-04-2023
Your vote is:
4.92 of 102 votes
In this blog post, I'll explore how to configure Burp to proxy traffic from mobile apps to assist with the security testing of mobile applications.
Getting started
To get started, there are a few pre-requisites needed:
- Windows OS
An up-to-date Windows OS with Android Debug Bridge (adb) installed.
- Kali VM
An up-to-date Kali VM with Android Debug Bridge (adb) installed (run sudo apt-get install adb )
- Burp Suite
An up-to-date Burp Suite.
- Mobile Device
A rooted Android device (in this example I'm using a rooted Nexus 5X running LineageOS).
Configuring the Burp listener
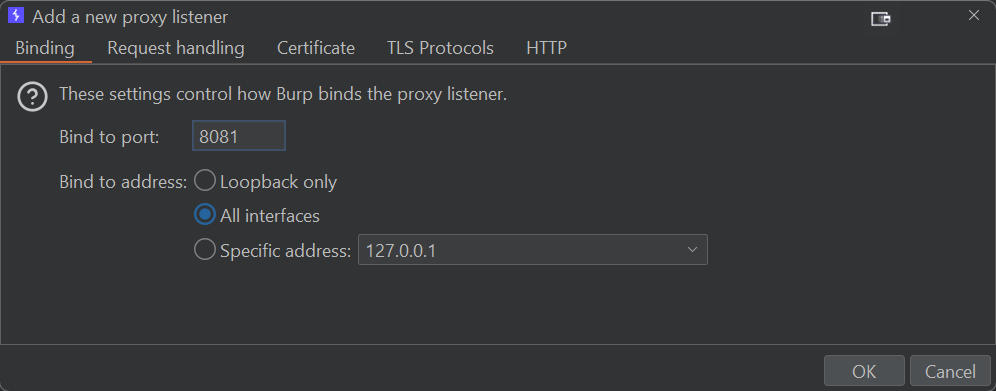
- Open up Burp
- Setup listener
Navigate to Proxy > Proxy settings > Proxy listeners then Add a new proxy listener and bind it to port 8081 across All interfaces
Connecting the mobile device
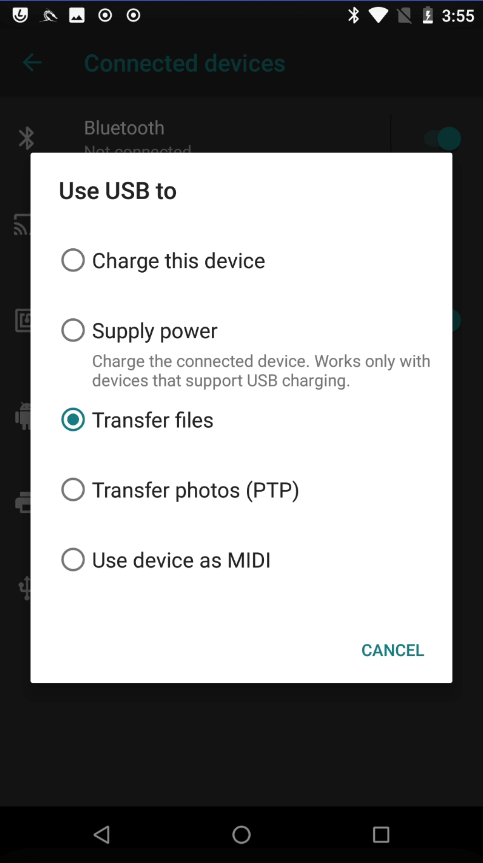
- Connect mobile device via USB
Connect the Android mobile device (in this example I'm using a rooted Nexus 5X running LineageOS) via a USB data cable.
- Configure the USB connection
On the device, navigate to Settings > Connected devices > USB and select Transfer files
Mirroring the mobile device to desktop
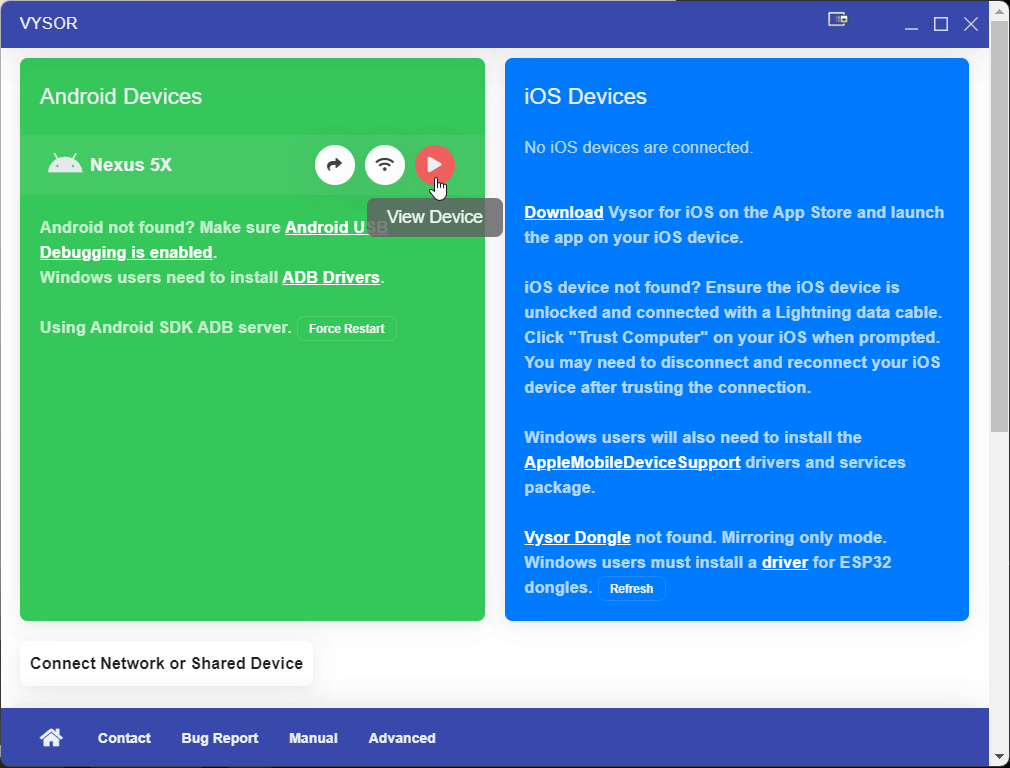
- Download and install Vysor
You can download Vysor from here.
- Run Vysor
Open Vysor and select the View Device button with a play icon. Your Android mobile device should not be mirrored to your computer screen.
- (a) Restart your mobile device and restart your computer.
- (b) Make sure you are using a USB data cable. Charge cables will not always allow data transfer over USB.
- (c) On Windows, download the Universal ADB Drivers. If that doesn't work, try installing your manufacturer's drivers.
- (d) Enable ADB debugging on the mobile device.
- (e) Set your mobile device USB mode to PTP (it is usually MTP or Charge Only).
Configuring the mobile device proxy
- Configure the mobile device network
On your Android mobile device, navigate to Settings > Network & Internet > Wi-Fi > and select the access point you wish to connect to. Then select Advanced options and set the Proxy to Manual
- (a) Proxy hostname = The IP address of the device using Burp which you wish to proxy traffic through
- (b) Proxy port = The port we set earlier which is 8081

Exporting the CA Certificate
Now Burp is configured to intercept the Android mobile device traffic, but without a valid CA Certificate in place will be unable to decrypt HTTPS traffic.
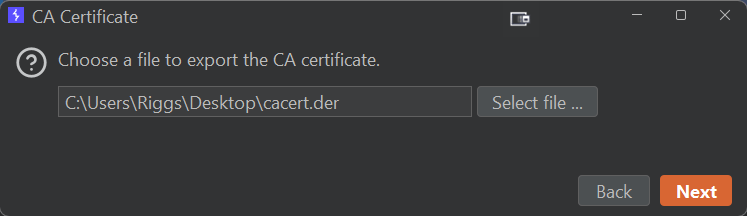
- Export the CA certificate
Open Burp and navigate to Proxy > Proxy settings > Proxy listeners then select the Import / export CA certificate button
- Select the CA certificate format
Export the CA Certificate in DER format. In this example we will name it cacert.der
Converting the CA certificate format
- Convert the DER file into PEM
Now we need to convert the DER file into PEM format for Android and have the filename equal to the subject_hash_old value appended with a .0 . To achieve this, we can move the cacert.der file over to a Kali VM and execute the following commands: openssl x509 -inform DER -in cacert.der -out cacert.pem
openssl x509 -inform PEM -subject_hash_old -in cacert.pem | head -1
mv cacert.pem [hash] .0 Example: 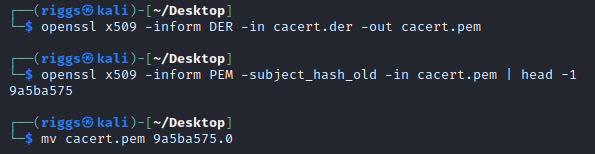
- Move the PEM file to the mobile device
Now we need to move the newly created PEM file over to the Android mobile device /system filesystem. To achieve this we can leverage the following adb commands: adb root
adb remount
adb push [cert] .0 /sdcard/
adb shell
mv /sdcard/ [cert] .0 /system/etc/security/cacerts/
chmod 644 /system/etc/security/cacerts/ [cert] .0
exit
adb reboot
Example: 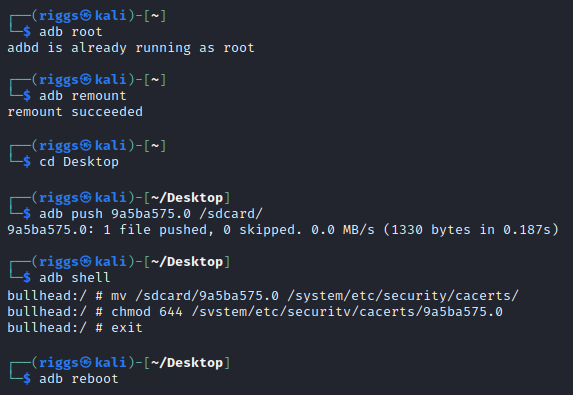
Verifying the CA certificate is installed
- Verify the certificate installation
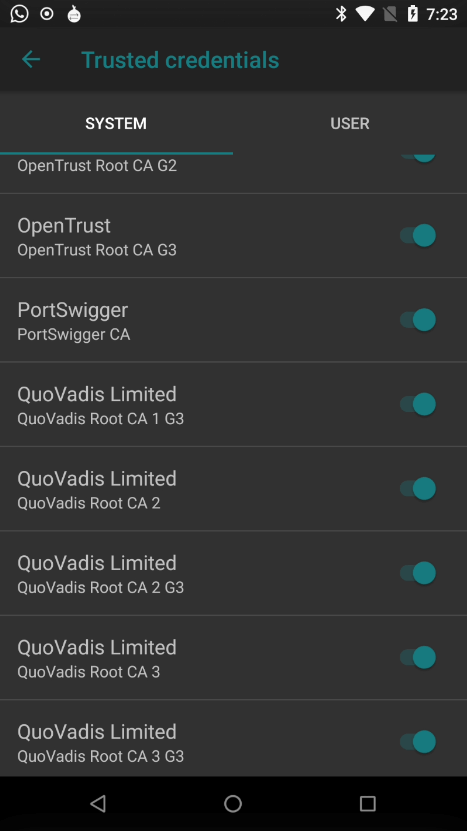
Once restarted, the CA Certificate should be installed on the Android mobile device. This can be verified by navigating to Settings > Security & privacy > Encryption & credentials > Trusted credentials and searching in the System directory to validate the CA Certificate from PortSwigger is present.
ABOUT THE AUTHOR

Jacob Riggs
Jacob Riggs is a senior cyber security professional based in the UK with over a decade of experience working to improve the cyber security of various private, public, and third sector organisations. His contributions focus on expanding encryption tools, promoting crypto-anarchist philosophy, and pioneering projects centred on leveraging cryptography to protect the privacy and political freedoms of others.
E3FE 4B44 56F5 69BE 76C1 E169 E3C7 0A52 9AEF DB6F
